How drone gimbal stabilization works and how to keep it
Understand how a 3-axis drone gimbal keeps footage steady, what causes jitter and drift, and how to calibrate and protect it for smooth aerial video.
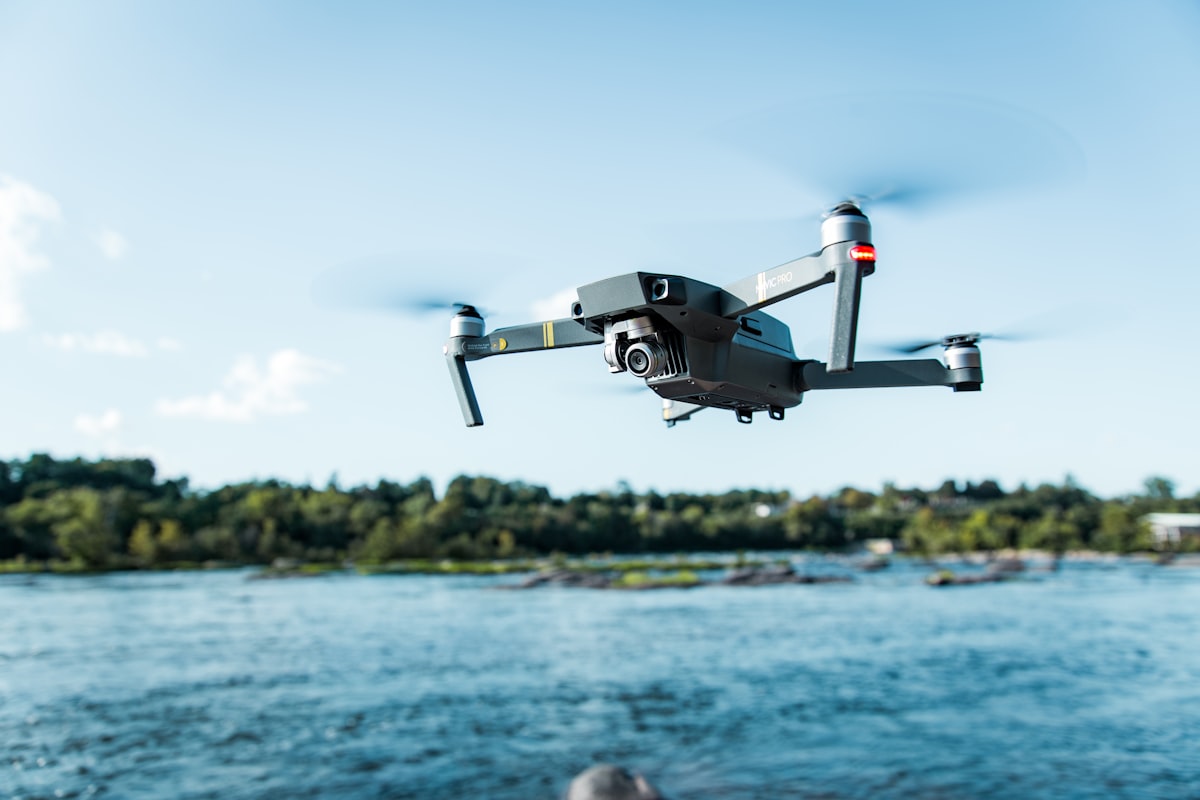
A drone gimbal is a motorised mount that keeps the camera level and steady while the aircraft pitches, rolls and vibrates. Motors driven by sensors counteract every unwanted movement hundreds of times a second, which is why aerial video looks smooth even in gusty air.
Most camera drones as of 2026 use a mechanical 3-axis gimbal on pitch, roll and yaw, sometimes combined with electronic stabilisation in software. Knowing how the system works helps you spot problems early and keep your footage clean.
How does a 3-axis gimbal actually work?
It measures the drone’s motion with an inertial sensor, then spins brushless motors on three axes to cancel that motion and hold the camera fixed in space. The result is a camera that stays level and pointed where you want, regardless of how the airframe moves.
The three axes each correct a specific motion:
- Pitch keeps the horizon steady as the drone tilts forward and back to move.
- Roll holds the image level as the drone banks left and right.
- Yaw smooths panning so turns look gradual rather than jerky.
An inertial measurement unit (IMU) inside the gimbal reads angular velocity and acceleration, and a controller uses that data to drive the motors. Because it reacts faster than any human, it removes both large tilts and tiny high-frequency vibrations.
What is the difference between mechanical and electronic stabilisation?
Mechanical stabilisation physically moves the camera with motors, while electronic image stabilisation (EIS) crops and shifts the frame in software. Many drones blend both, using the gimbal for large motion and EIS for the last bit of polish.
Trade-offs to understand:
- Mechanical gives the cleanest result with no loss of resolution, but adds weight and moving parts that can be damaged.
- EIS needs no extra hardware but crops into the image, slightly narrowing your field of view and reducing detail.
- Combined systems, common on modern drones, give smooth footage while keeping the crop small.
For serious aerial work the mechanical gimbal does the heavy lifting, and EIS is a helpful supplement rather than a replacement.
Why is my footage jittery or the horizon tilted?
Jitter and a tilted horizon usually come from a gimbal that needs calibration, a balance problem, or physical damage from a knock. Most cases are fixable in a few minutes.
Common causes and fixes:
- Tilted horizon. Run the gimbal auto-calibration and horizon adjustment in your app, on a level surface with the drone powered and still.
- Small vibrations (jello effect). Often loose or worn vibration-absorbing dampers, or an unbalanced propeller. Inspect the dampers and check props for chips.
- Sudden jumps or stutters. Can indicate a stressed motor, a loose connector or a firmware bug. Restart, update firmware and recalibrate.
- Drift over time. Usually an IMU that needs recalibration.
Always start with the software calibration, because it solves the majority of complaints without any disassembly.
If you want to see how these hardware skills fit inside the broader rules for flying safely and legally, the guides and practice questions in the dronexamine trainer put the technical detail in its regulatory context.
How do you calibrate a gimbal correctly?
Place the drone on a firm level surface, keep it completely still, and run the gimbal and IMU calibration routines from the app in that order. The drone must not be touched or bumped while it works.
A reliable procedure:
- Update to the latest firmware first, since calibration values can reset after an update.
- Set the drone on a stable, level table with no vibration nearby.
- Run the gimbal auto-calibration from the settings menu and wait for it to finish.
- If the horizon still looks off, use the fine horizon and roll adjustment sliders.
- If drift persists, run the IMU calibration, again keeping the drone perfectly still.
If problems continue after calibration, the issue is likely mechanical rather than software, and you should check the exact recovery steps in your manufacturer’s guidance.
How do you protect the gimbal on the ground and in the bag?
Fit the supplied gimbal guard whenever you transport or store the drone, and always power down fully before removing or replacing it. The gimbal is the most fragile part of most drones, and transport shocks are the leading cause of damage.
Good habits:
- Use the gimbal clamp or cover for every trip, not just long ones.
- Let the gimbal finish its startup self-check before you take off, and its shutdown routine before you pack up.
- Never force the gimbal by hand while it is powered, because you can strain the motors.
- Keep sand, grit and moisture away from the moving joints.
Treating the gimbal gently on the ground prevents most of the faults people blame on the software.
Common questions
Why does my gimbal make a buzzing noise? A faint hum from the brushless motors is normal as they hold position. Loud grinding or repeated clicking is not, and points to an obstruction, damage or a motor fault that needs inspection.
Can I fix a bent gimbal myself? Minor issues like calibration and damper replacement are user-serviceable, but a bent arm or damaged motor usually needs a professional repair or a replacement gimbal. Check your manufacturer’s repair options before attempting anything structural.
Does wind affect gimbal stabilisation? The gimbal compensates for the drone’s movement in wind, but in very strong gusts the aircraft may run out of power to hold position, and footage can suffer. The gimbal itself is not blown around; the whole aircraft is.
Should I calibrate the gimbal before every flight? No. Calibrate after a firmware update, after a knock, or when you see drift or a tilted horizon. Routine flights do not need it, though the pre-flight self-check should always complete cleanly.
Your next step
Before your next shoot, put the drone on a level surface and run a full gimbal and IMU calibration, then fit the gimbal guard for transport from now on. Those two habits eliminate the most common causes of shaky footage and physical damage. When you are ready to link this hardware knowledge to the rules that govern where and how you fly, the guides at dronexamine walk you through the operational side step by step.
Related articles
ND filters for drones explained, when and which to use
How neutral density filters control shutter speed for smoother drone video. Learn ND strengths, the 180-degree rule and when filters help or hurt.
Compass and IMU calibration, when and how to do it
When to calibrate your drone compass and IMU, how to do it correctly, and the mistakes that cause drift and toilet-bowling. A practical field guide.
What to do after a drone crash, a step-by-step guide
A calm, practical procedure for after a drone crash: securing the site, inspecting for damage, checking the battery and deciding when to fly again.